How To Create "Masonry Image Gallery" in Divi
Image masonry gallery makes for beautiful page aesthetics.
It gives your website a professional look if you curate high quality images.
Create masonry gallery using images in WordPress Media library.
- Set responsive masonry columns for all types of devices.
- Control space between columns
- Create an image overlay on hover.
- Create a popover gallery on image click.
Create an optimized masonry gallery of variable image height. There are no fixed height rows.
Pre-requisites
- A WordPress website
- Divi Theme by Elegant Themes
- Masonry Gallery & Post For Divi plugin
Tools
- Computer
Total Duration : 9 minutes
Start your FREE trial. No credit cards required.
Step 1 - Import Categorized Images In WordPress Media (Optional)
-
For this howto, we need images in WordPress media. Please note this is optional step and is ideal for a temporary website.
- Download image attachment import file - wp-attachments.xml
- Install & activate the WordPress Importer plugin.
- To import the images,
- Log into WordPress Admin
- Goto Tools > Import
- Click on Run Importer
- Select the wp-attachments.xml file for upload
- Click Upload file and import button
- Assign Author for the imported images
- Select the Download and import file attachments checkbox
- Click Submit button
- In sometime the importer will download and setup the images
- Visit WordPress Admin > Media > Library and confirm if the images are setup
- Visit WordPress Admin > Media > Categories and confirm if you can see categories
Start your FREE trial. No credit cards required.
Step 2 - Image Category Management
-
Masonry Gallery & Post For Divi plugin adds the ability to categorize Media images
-
You can use one or more categories and create masonry image gallery using it. More on it in the next step.
-
To categorize an image.
- Visit WordPress Admin > Media > Library
- Library listing has a listing and a grid view.
- In the grid view
- Click on the image thumb.
- This bring up an Attachment Details modal window.
- Click on the Edit more details link.
- In the listing view
- Click on the Edit link while hovering over the image thumb.
- Within the Categories box in the side bar.
- To add a new category, enter the name in the input box and press Add button
- To remove a category, click on x icon next to the category name below the input box
Start your FREE trial. No credit cards required.
Step 3 - Insert "Masonry Image Gallery" Divi Module
-
Masonry Image Gallery module is available for regular and full-width section
To insert the module- Edit a page in divi's visual builder.
- Within a divi row click on the plus icon for Add New Module
- Search for Masonry Image Gallery, click and add the divi module.
Start your FREE trial. No credit cards required.
Step 4 - Create Masonry Image Gallery
-
To create a masonry image gallery using the Masonry Image Gallerydivi module
- Select images for the masonry gallery
- Click on Content tab
- Select the Image Selection accordion toggle and open it
- The Image Selection Type field has two options
- Select / Upload Images - With this, one can manually upload or select existing images from the media library
- Images field gets activated
- To add an image, click on Add Gallery Images plus icon. Select/upload the images you want
- You can drag drop the selected images to set the listing order
- Custom Filter - With this, one can (database) query images from the media library. Options are
- Filter By Category - A toggle ON/OFF switch. Set ON to filter images by categories.
- When set ON, a multi-checkbox field Categories is visible. Select one or more.
- Include Image Items. Comma-separated ID - Create a masonry gallery by adding comma-separated image IDs.
- This option super-seeds all other options in custom filter
- Set Sort Images By drop-down field to Preserve Image ID order given in the "Include Image Items. Comma-separated ID" when using this. It sorts images in the order of the entered image IDs
- Exclude Image Items. Comma-separated ID - To exclude images from the custom filter add comma-separated image IDs.
- Images To Fetch - Set the number of images to fetch. Set -1 to fetch all images
- Sort Images By - Set the sorting criterion for the image listing. Options are
- No Order - Doesn't use any sorting.
- Order by Image ID - Sort by the ID of the image
- Order by Author - Sort by the image author name
- Order by Title - Sort by the image title
- Order by Slug - Sort by the image slug
- Order by Date - Sort by the image date
- Order by Last Modified Date - Sort by the last modified date
- Random Order - Sort randomly
- Custom Order - Page Attributes Order Field - Sort by the "Order" values in the Attributes Attributes section on the image item edit page.
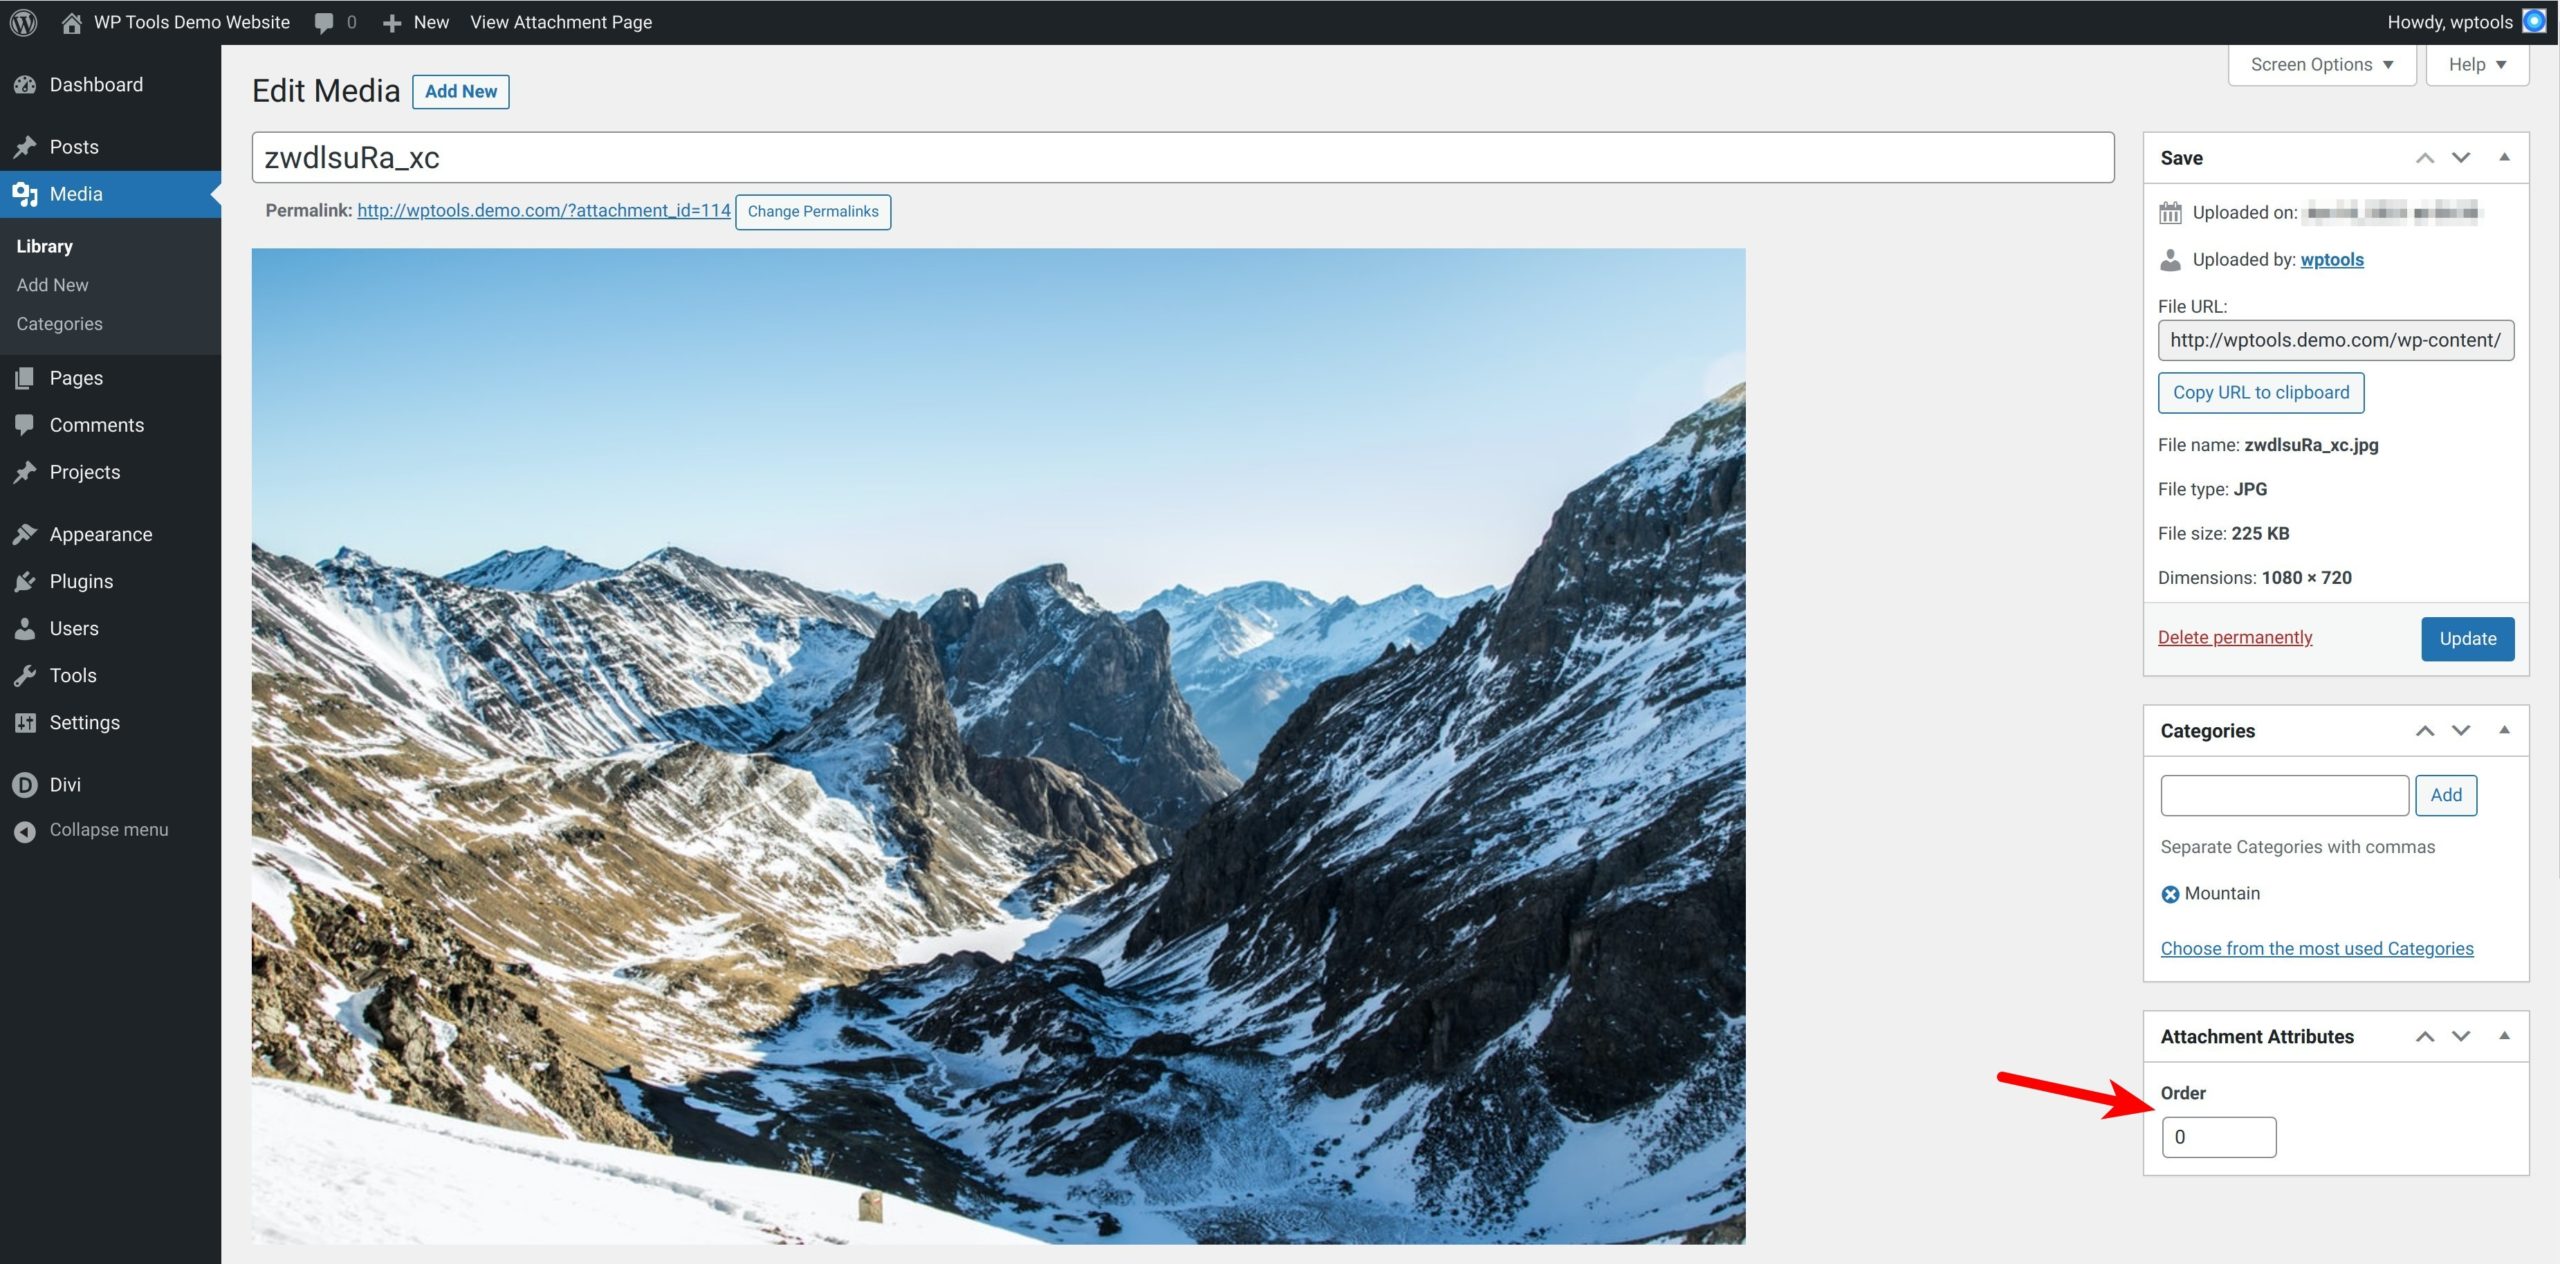
Attachment Order Attribute - Masonry Image Gallery And Posts
- Preserve Image ID order given in the "Include Image Items. Comma-separated ID" - Use the order of the IDs set in the Include Image Items. Comma-separated ID field below
- Sort Direction - Set the direction of the sort. Options are
- Ascending Sort in ascending order. For example A to Z
- Descending Sort in descending order. For example Z to A
- Filter By Category - A toggle ON/OFF switch. Set ON to filter images by categories.
- Select / Upload Images - With this, one can manually upload or select existing images from the media library
- Set content visibility
- Along with the image, you can show/hide title and description for image. To do so,
- Click on Content tab
- Select the Content accordion toggle and open it
- Following are the content fields.
- Show Title - A toggle ON/OFF field to show/hide the title. The title text is the image attachment title.
- Show Description- A drop-down field for description. Options are
- None - Don't show description
- Image Caption - Use the image attachment caption as the description
- Image Description - Use the image attachment description as the description
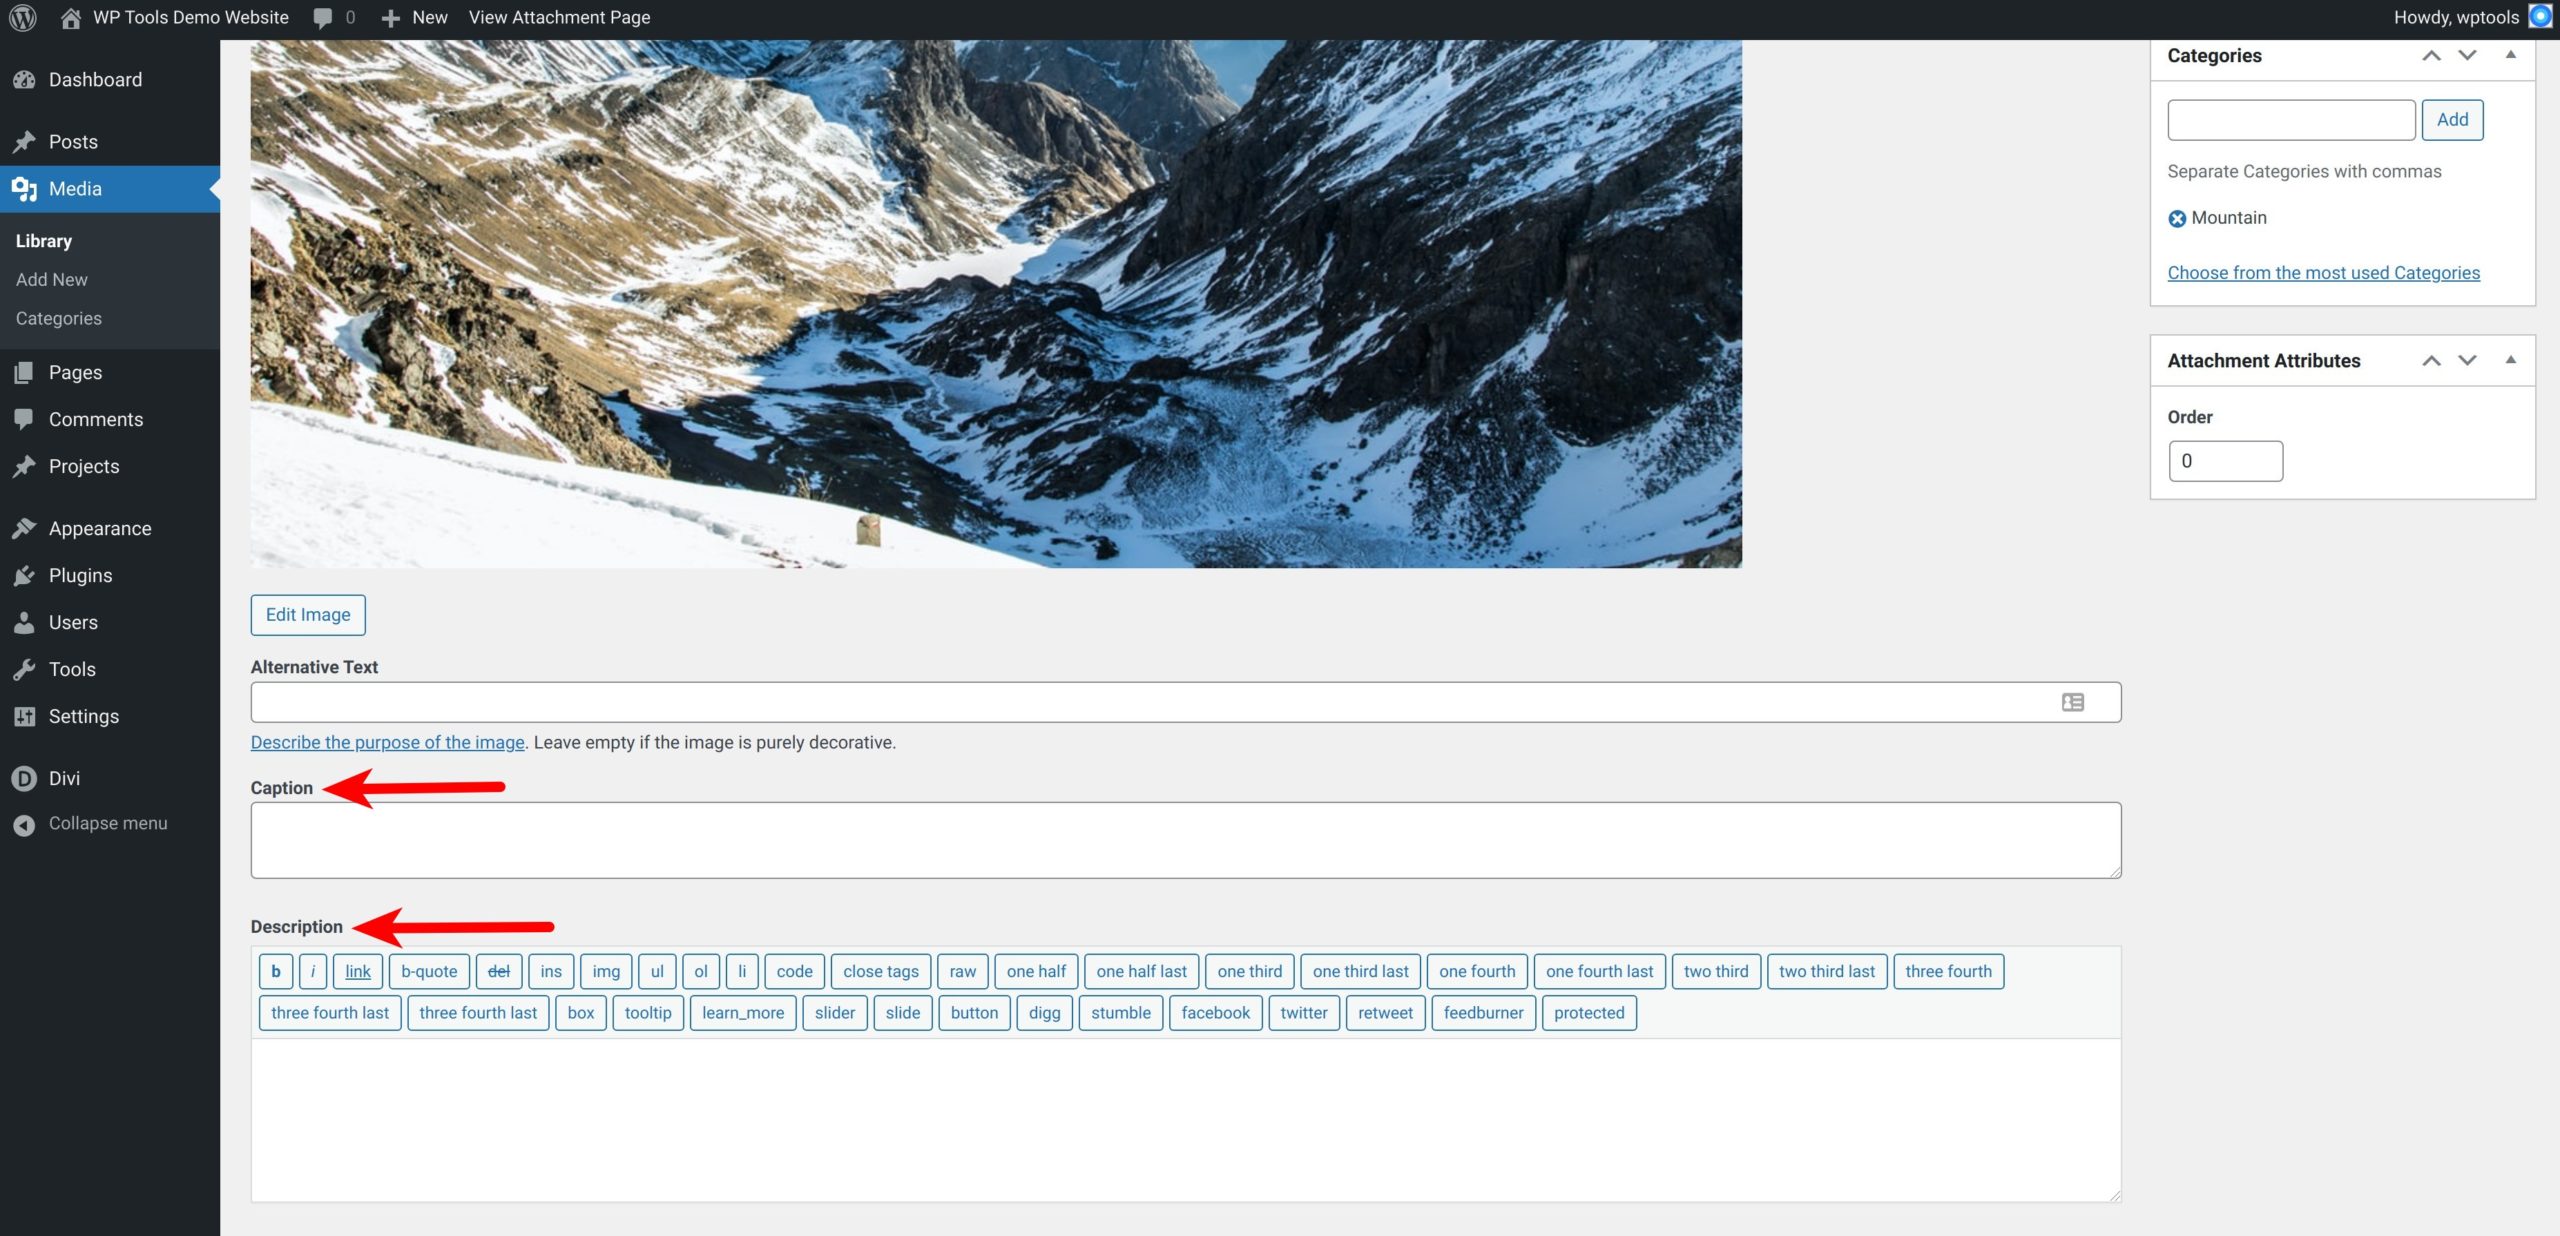
Image Caption And Description - Masonry Image Gallery And Posts
- Masonry Settings
- Here you will set the responsive number of columns and their spacing.
- Click on Content tab
- Select the Masonry Settings accordion toggle and open it
- Columns - Responsive field to set the number of columns for desktop, tablet and phone devices
- Space Between Items Set the space between each grid item. We apply margin right and bottom to get item.
- Masonry Styling
- Background - To set the background
- Click on Content tab
- Select the Background accordion toggle and open it
- Set color, gradient, image or video background
- Grid Item - Represents styles for a grid item. You can style
- Click on Design tab
- Select the Grid Item accordion toggle and open it
- Background
- Border
- Border Corner (radius)
- Box Shadow
- Grid Item : Hover Overlay - Represents the overlay on grid item mouse over. Options are
- Click on Design tab
- Select the Grid Item : Hover Overlay accordion toggle and open it
- Show Grid Item Overlay On Hover - An ON/OFF toggle to show / hide over on item mouse over. When set to ON, set
- Background
- Set icon, its size and color
- Show Grid Item Overlay On Hover - An ON/OFF toggle to show / hide over on item mouse over. When set to ON, set
- Title - Represents the styles for the title when shown.
- Click on Design tab
- Select the Title accordion toggle and open it. Style
- Margin & Padding
- Set heading level
- Set fonts, style, alignment, color, size, letter spacing, line height and shadow
- Description - Represents the styles for the description when shown.
- Click on Design tab
- Select the Description accordion toggle and open it. Style
- Margin & Padding
- Set fonts, style, alignment, color, size, letter spacing, line height and shadow
- Overlay - Set styles for the image item mouse-over overlay.
- Background
- Background Opacity
- Overlay Arrows - Set styles for the overlay image gallery arrows
- Color
- Background Color
- Size
- Rounded Corner (Arrow Container)
- Border (Arrow Container)
- Overlay Close Button - Set styles for the overlay close button
- Color
- Overlay Gallery Counter - Overlay gallery has a counter text. Set styles for
- Set fonts, style, alignment, color, size, letter spacing, line height and shadow
- Overlay Item Title - Set styles for current overlay image gallery item title.
- Set fonts, style, alignment, color, size, letter spacing, line height and shadow
- Background - To set the background
- Spacing Set margin and padding for the masonry grid
- Click on Design tab
- Select the Spacing accordion toggle
- Border Set border for the masonry grid
- Click on Design tab
- Select the Border accordion toggle
- Box Shadow Set box shadow for the masonry grid
- Click on Design tab
- Select the Box Shadow accordion toggle
- Custom CSS Set custom css for elements of the masonry grid
- Click on Advanced tab
- Select the Custom CSS accordion toggle
- Lot of grid elements available for setting custom css
- Select images for the masonry gallery
Start your FREE trial. No credit cards required.
Step 5 - Demo Page Layouts
-
Below are demo page layouts for the Masonry Posts divi module. Import them to your WordPress page to see them in action.
To Import A Demo Page Layout
- Create/edit a page in the divi visual builder.
- To show the page settings toolbar at the bottom, click on the ellipsis icon.
- Click on the portability icon.
- A modal window to export/import the page shows up
- Click on Import tab.
- Click on NO FILE SELECTED
- Check Replace existing content if you wipe off existing content after import.
- Select the divi builder layout json file from your file manager.
- Click on Import Divi Builder Layout button to start the import.
- Once imported, page reloads with the imported layout.
- Save the page.
-
Please find the demo divi builder layouts below.
Download - Masonry Image Gallery Layout - Custom Filter Layout that uses custom filter to query images from media library
Download - Masonry Image Gallery Layout - Manually Selected Layout that uses manually selected/uploaded images from media library.
PLEASE NOTE: This layout doesn't import the images into your media library, so you will have to removed and add the images as an extra step.
Start your FREE trial. No credit cards required.